Sentio Pro documentation
Introduction
Thanks for the interest shown to our products. We’re doing our best to offer you high-quality WordPress themes and an exceptional support service. For that, we’ve created a comprehensive step by step guide on how to use and customize this theme. Read carefully all the instructions and let us know if you have some questions, we’ll be glad to help you out. You can also reach us at marketing[at]designhooks.com if you need more help.
Theme installation
Please follow these steps to install Sentio Pro theme:
- Download the theme archive you got from our site: Sentio-pro.zip
- Login to your WordPress dashboard, go to Appearance – Themes – Add new – Upload theme, select the theme archive Sentio-pro.zip and click on Install now.
- Activate the theme. It will appear in your current list of themes under Appearance section.
- Once you activate the theme you’ll have to install our Utils plugin to get extra features and custom posts. A message will appear asking you to install the plugin, click on Begin installing plugin – Install and then activate the plugin.


Alternative method: you can also install our WordPress theme manually, using a FTP client. Here is how to do it:
- Download the theme archive you got from our site: Sentio-pro.zip
- Connect to your host using a FTP client
- Access the /wp-content/themes/ folder
- Upload the installation file of your theme to this folder
- Activate the theme from Appearance – Themes in your WordPress admin
Setting up the home page
In order to set up appropriate front page and posts page you’ll have to do the following:
- Create a page that will be used as your home page and another one that will be used as a page with posts. To do this, go to Pages – Add new and create the appropriate pages. If you already have them, follow the next step.
- Go to Settings – Reading – Front page displays then select the A static page option and select the appropriate pages for home and posts pages (in our case it’s the Home and Blog page, but you can name them as you wish).
- Now you set up you pages accordingly and can start building or setting up new sections.
Note: The option Blog pages show at most will also affect the portfolio items. So if you set up the option to 6 posts, your portfolio page will have 6 items per page.

Custom posts
Sentio Pro includes 6 custom posts (slider, services, promo, portfolio, workflow, clients) that you can use to create diverse sections within your site. Here is how to work with them:

Slider
To create a slider you have to:
- Access the Slider custom post and click on Add new.
- Name your slider. Click on + to include a slide. Complete the options you need: add an image, set up the slide title, subtitle, button URL and button title.
- Include as many slides as you need and hit the Publish button to save the options.
- Now, go to Appearance – Customize – Content – Front page – Page slider and select the slider you recently created, from the drop down menu.


Video: setting up custom posts via Customizer
Services
To create a section with services on your site you have to:
- Access the Services custom post and click on Add new.
- Name your custom post. Click on + to include a service. Select an icon (you can later change it if you wish), include the service title and a little description.
- Include as many services as you need and hit the Publish button to save the options.
- Now, go to Appearance – Customize – Content – Front page – Page services and select the services custom post you recently created (from the drop down menu).


Promo section
Promo section is the area on you home page where you wish to highlight an important post, promotion or announcement and provide a link to it. To define it you have to:
- Access the Promo custom post and click on Add new.
- Name your custom post and include the description in the body of the post.
- Set up the background image, subtitle, button text and URL. Hit the Publish button to save the changes.
- Now, go to Appearance – Customize – Content – Front page – Page promo box and select the promo custom post you recently created (from the drop down menu).


Portfolio
Here you can list your latest works and display them on home page and on the dedicated Portfolio page. By default, maximum 3 portfolio projects with 4 images each will be shown on Home page. The rest of the projects will be shown on your dedicated Portfolio page (you’ll have to create and add it to your menu).
To create a portfolio with multiple projects you have to follow these steps:
- Access the Portfolio custom post and click on Add new.
- Name your portfolio project and include its description in the body of the post. Include an image for each item by clicking on +, add as many images as you want. You can also add captions.
- Set the featured image of your portfolio project (it will be displayed on your dedicated portfolio page). Complete the portfolio meta section, which includes: client’s name, client’s URL, color palette (include HEX values of the colors), delivery time (how much time it took to create the project). Hit the Publish button to save the project.
- Create as many projects as you need. You can also add different filters to categorize your portfolio projects.
- Go to Appearance – Customize – Content – Front page – Latest portfolio title and type in the name of your portfolio to activate it.
Now, the latest 3 projects of your portfolio will be shown on the home page.


If you also want to display a dedicated Portfolio page in your site’s menu you have to:
- Create a new page (go to Pages – Add new) and name it as you wish (ex. My works)
- Go to Appearance – Menus and add the page you recently created to your main menu (select the portfolio page and click on Add to menu button). Drag and drop the menu items if you want to rearrange them.
- Go to Settings – Reading – Front page displays and select your portfolio page from drop down menu (in our case it will be My works). Click on Save changes.


Now, you have a dedicated portfolio page in your main menu where all your project are listed.
Note: Don’t forget to set up featured images for your portfolio projects, otherwise they will not be visible on your dedicated portfolio page.
Workflow
This is a section where you can display your workflow in a beautiful way (with different icons and descriptions). To create your workflow section you have to:
- Access the Workflow custom post and click on Add new
- Name your custom post. Include as many workflow steps as you need by pressing the + Select an icon and include a title for teach step. Hit the Publish button to save the options.
- Go to Appearance –Customize – Content – Front page – Workflow box and select the workflow custom post you recently created from the drop down menu.


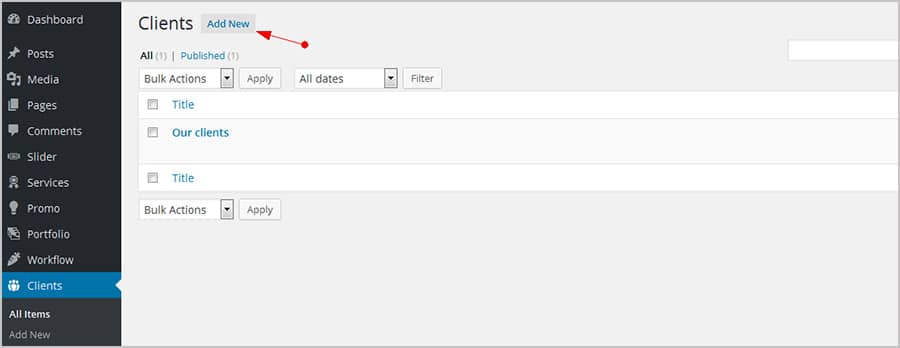
Clients
To create a section with your clients you have to:
- Access the Clients custom post and click on Add new.
- Name your custom post. Click on + to include a client. Include the logo/image of your and the URL of your client’s site.
- Include as many clients as you need and hit the Publish button to save the options.
- Go to Appearance – Customize – Content – Front page – Clients box and select the clients custom post you recently created (from the drop down menu).

Shortcodes
You can use shortcodes to easily insert predefined components on different pages or posts within your site. Sentio Pro theme is packed with the following shortcodes:
[slider slider_id=””] for slider, where id is the id of the post
[services services_id=””] for services
[workflow workflow_id=””] for workflow
[clients clients_id=””] for clients
[contact_form email=””] for contact form, where email=”” is the email on which you want to receive the messages.
You can also view or copy the appropriate shortcode when you edit a custom post.

Example: Let’s suppose you have a Contact page and wish to add a nice looking contact form on that page. Follow these steps to do that:
- Copy the appropriate shortcode for contact form [contact_form email=”[email protected]”], adjust the email address as you wish.
- Paste the shortcode on the page you need (in the body of the post) and save it.
Now you have a dedicated page with a contact form. The same procedure applies to other shortcodes, you can include them on any page/post you like.


WordPress Customizer
WordPress customizer allows you to easily personalize your theme and preview/save your changes instantly. Sentio Pro is fully compatible with this core WordPress feature and offers you powerful customization options. All the features are easy to use, intuitive and well organized/grouped. To access the WordPress Customizer click on Appearance – Customize, you will be redirected to visual editor, where you’ll find:
General settings
Here you’ll be able to customize:
- Site identity – here you can set up your site title, tagline and site icon.
- Background image – here you can set up the a background image for your site
- Static front page – we’ve already explained how to set up your front page in Setting up the home page section, but you can do the same from here.
- Colors – use this option to change the header text color, background color, text color. Also, choose from 5 additional color ranges.
- Header image – if you’re not willing to use the slider, you can set up a static header image.
Header
- Header layout and content – Sentio Pro offers you 4 predefined header styles. Here you can choose the one you like, include additional info (contact info, phone number, etc.) and upload your site logo. Also, you can set up the links of your social media pages and select the appropriate icons.
Content
- Front page – on this section you can set up the appearance of your home page. Here you can select different sections that you already created using custom posts (slider, services, promo, portfolio, workflow, clients). Simply choose the custom posts you already created (from the drop down menus) and preview/save the changes. We’ve already explained how to set up these sections in Custom posts paragraph of this document.
Footer
- Footer layout and content – Sentio pro offers you 2 predefined footer styles. Here you can choose the one you like, upload your logo and include additional info.
Menus
- In the latest versions of WordPress you can customize your Menus in Customizer as well. Here you can define your menu locations and add, remove, rearrange different menu items.
Widgets
- Beside standard widgets offered by WordPress, Sentio Pro includes 4 custom widgets which you can place in your sidebar. To activate a widget you have to drag it to your sidebar or click on it and access the Add widget button.
Custom widgets
Sentio Pro is packed with 4 custom widgets. These are: About info, Instagram feed, recent posts, social media. To identify them have a look at “custom” label in your list of widgets, located in Appearance – Widgets.

To activate a widget you have to follow these steps:
- Go to Appearance – Widgets
- Select a widget you want to activate (ex. Instagram feed)
- Drag it to your sidebar or click on it and then click on Add widget button.
- Add relevant info to your widget (title, user, number of images) and click on Save. You can reorder your widgets in the sidebar as you wish, by dragging and dropping them.

You can also add or remove different widgets using the Customizer. To manage your widgets via Customizer you have to access the Appearance – Cuztomize – Widgets – Widget area section and add/remove/rearrange your widgets.
Feedback
Read the comprehensive review of our theme on creativecoon to find our more details. Please note that our theme is in continuous development/improvement process. Let us know if you would like to review it, we appreciate your feedback!