How to Create a WordPress eCommerce store with Shopify

Are you planning to set up an online store?
Desire to sell your products promptly?
According to the type and size of an online store you want, Shopify is an ideal choice for you.
Shopify has gained a lot of buzz since its inception. It is basically a powerful e-commerce solution that allows you to create an aesthetically appealing and fully functional online store. It includes almost everything that you may need to establish a successful online presence.
In fact, Shopify is one of the best eCommerce builders that make the process of building an online store a lot easier and convenient for beginners. If you are planning to create creating a WordPress eCommerce store you need to hire a custom WordPress development company that could create your eCommerce store according to your needs.
In today’s post, we are going to show you how you can create a feature-rich and visually stunning e-commerce store with Shopify.
However, before moving any further, let’s see why you should choose Shopify.
Simplify: Shopify streamlines much of what makes setting up an e-store annoying for many and scary for some. It has a very simple to use architecture integrated with the user-friendly, functional and clean dashboard. It enables you to alter theme settings, change menus, add posts and pages and edit inventory.
Has many inbuilt tools: This e-commerce solution has an array of inbuilt tools including inventory management system, analytics, carousels, upsells, coupon codes and blog to assist you in selling all in one place.
Professional support: Unlike other CMS and e-commerce, open-source solutions that depend on the community for support, Shopify offers a committed support team that provides helpful and detailed service on the forums.
Bundle of payment gateways: One of the most important features that many e-commerce solutions lack in is the availability of payment gateways. Shopify removes the necessity of buying extra extensions to add different gateways. It comes with an inbuilt plug and plays payment gateways.
Simple Backend Administration: Maintaining a successful e-store involves a lot of chores including adding/deleting and editing products from the backend. Thanks to the extremely simple backend system, serving customers, adding products and setting things up is amazingly easy.
Though the list of reasons to use Shopify for your next online venture is endless, these are some of the most popular reasons that make Shopify a preferred choice among store owners.
Without further ado, let’s create a WordPress e-commerce store with Shopify.
Step 1: Signing up with Shopify
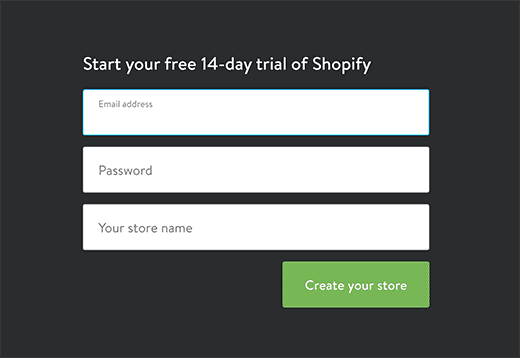
First things first, create an account on Shopify. It offers a 14-day free trial after which premium plans start from $9 per month.
Fill in your details such as email address, and password and choose a name for your store. Once you complete the form, click on “create your store” button to get started.
Step 2: Installing the Shopify e-commerce plugin

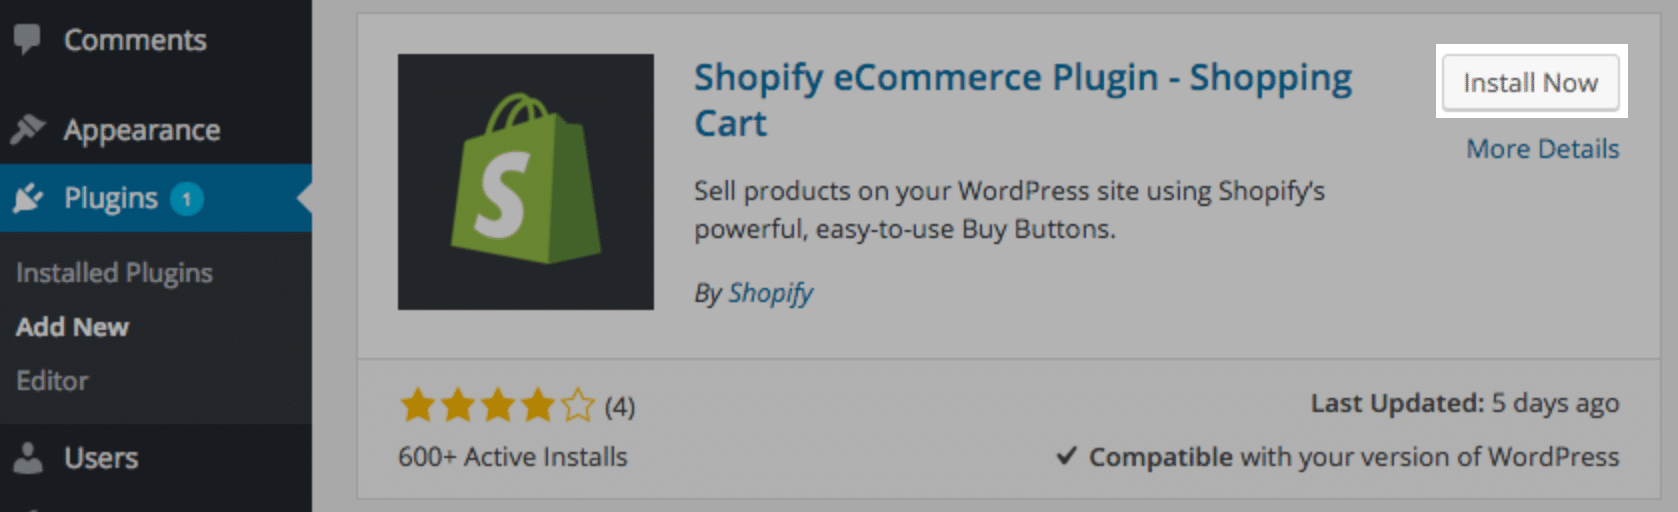
After creating an account with Shopify, open your WordPress website and install a Shopify e-commerce plugin. On installing, activate it.
Once activated, it will automatically add a new menu item namely “Shopify” in your dashboard.
Step 3: Connecting your website with Shopify
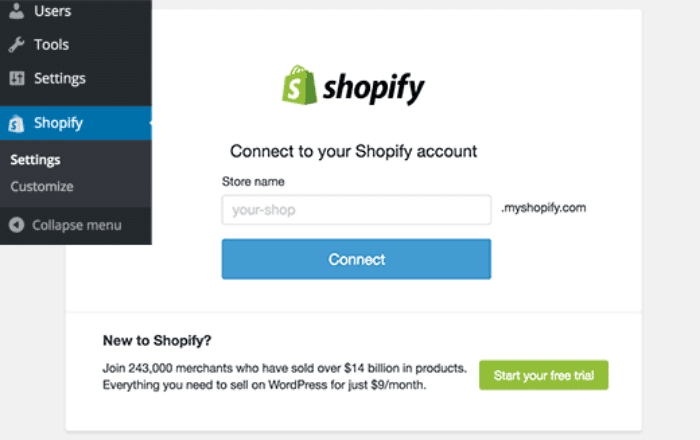
Open Shopify option and connect it with your previously created Shopify account by entering your store name and hit the connect button. It will automatically connect your Shopify account with your WordPress website and you will be able to see it’s settings page.
After connecting your account and website, you are required to perform three tasks.
- Add a few products to your store
- Setup payment gateways
- Setup Shipping
Step 4: Adding products

Now let’s add some products to your store to get started.
In order to add a product to your store, just click on the “Add a Product” button. You will be redirected to a Shopify’s add product page.
The product page is well-designed to make it easier for the store owner to add products without having to write even a single line of code.
The product page features a Title field, the Description field, an option to add an image, product price, shipping and inventory information.
Fill in the details and hit save.
Repeat the process as many products as you want to add.
Step 5: Setting up Payments

After adding products, it’s time to set up payments. Go back to your dashboard and navigate to the Shopify settings page. There, you will see an option to Set Up Payments. Click on it to continue. This will redirect to Shopify’s payment setup page.
As mentioned earlier, Shopify supports a variety of payment gateways including Skrill, Authorize.net, Stripe, PayPal, etc.
Shopify, by default, uses your PayPal email ID to accept payment, though you can change it and enter any other email address you want.
You can also add any other payment method you want by selecting them on the page. You need to provide additional details to connect your selected payment option and Shopify.
Once done, return to your WordPress website dashboard.
Step 6: Configuring Shipping
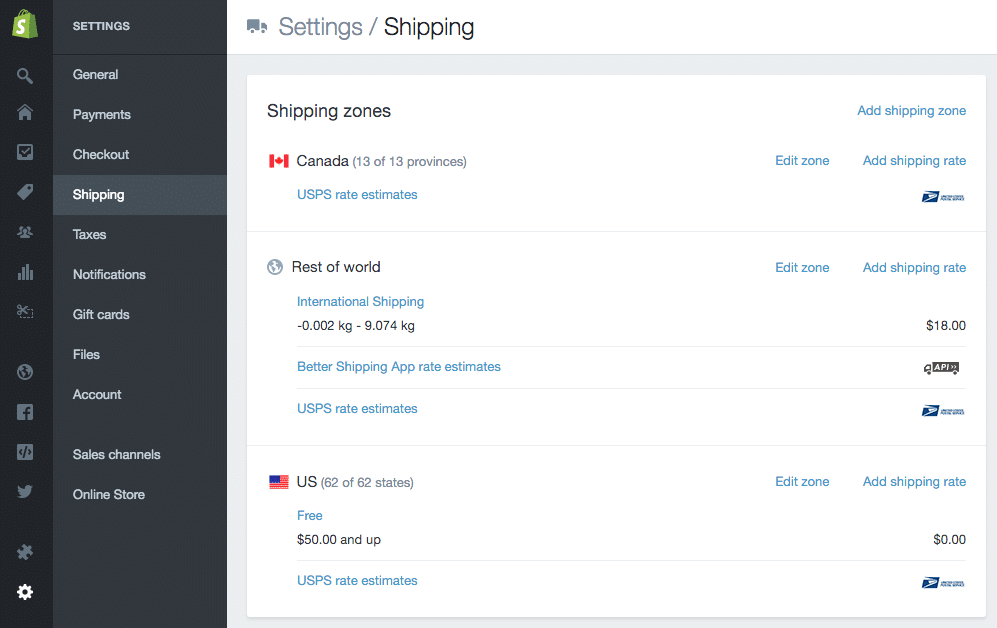
The last option is to set up shipping. Again, click on the settings page of Shopify and hit Setup shipping button.
Fill in the shipping origin information and then enter shipping cost and shipping zones.
It is extremely easy to set up shipping options on weight and order prices. You can also add zones for international shipping and offer free shipping.
Upon configuring shipping information, you have successfully set up Shopify on your website.
How to add Shopify products on your WordPress website?
 You have added products to your store, configured shipping and payments, it’s time to showcase your products on your website.
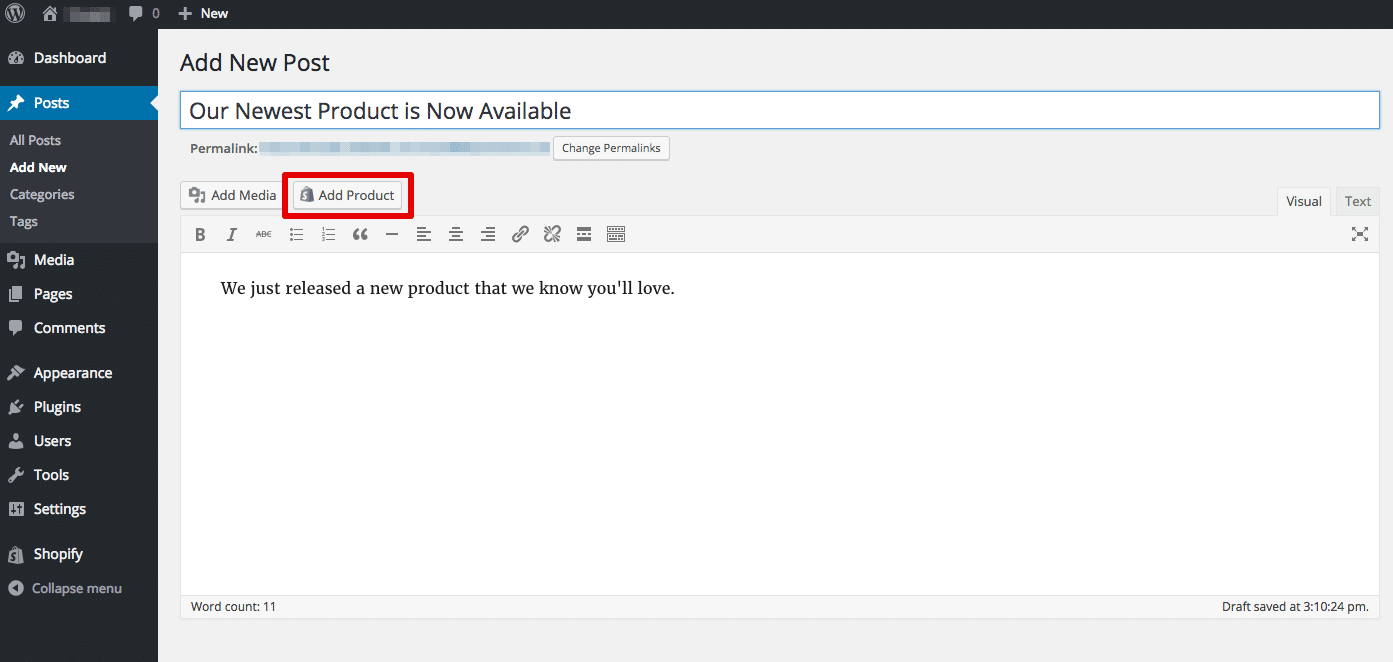
Create a new page or post in your WordPress. On creating a new post or page, you will see a new option added namely “Add Product”.
Upon clicking it, you will get a drop-down menu of your added products. You can choose a particular product or a collection of products from the listing. You can choose the type of embed you want to add. It allows you to add a buy now button or a buy now button with an image.
If you also want to show product details and other information along with the product, you can add a buy now button. This allows you to build separate image galleries for your products.
However, if you are just looking to add a product, then select the button embed, price, and image.
Hit publish now to display your products on the page or post.
Visit your site to check if everything works fine.
Displaying products in website sidebar:

All you need to do is add a widget to a sidebar where you would like to show your products or collects. Click appearance → widgets and you will notice a new widget added “Shopify” to the available list of the widgets. Go ahead and add it to the sidebar.
Go to widgets settings, and open add product button to choose the collections or products you would like to add.
Hit save to save the changes made in the widget settings.
Visit your site to see your products added in the sidebar section.
Congratulations, you have successfully created a store with Shopify.
We have tried to explain the entire process in steps to make it easier for our audience to build online stores without having to mess around with the coding or you can hire a professional WordPress developer to get the job done in the right way.
We have this post helped you create your e-commerce store in WordPress website with Shopify.
Do share your reviews and experiences with us and our audience in the comments section below.
You may also like

Understanding SEO Plugins For WordPress And Their Benefits!
Many webmasters often limit themselves to only one content management system primarily for the benefits of search engine optimization. Most of them claim they prefer one type of CMS because […]
Read More
Best 15 Free Photography Themes For WordPress
The photography industry is fairly crowded. And when you are running a Photography blog, it is really important to differentiate yourself from the competition. One of the key ways to […]
Read More
DBA Consulting explains why it is so important to take care of WordPress database
If you are using WordPressa lot, then you must know the basics of how it works. You need not be a master of WordPress but having an idea about the […]
Read More